
Configure approval workflows in Brixit CRM
Open Settings → Approval workflows as an authorised administrator. First define who approves, then assign that workflow to the actions that need review.
1. Define the approval chain
- On Workflows, select New workflow.
- Enter Workflow name and Description.
- Give the first step a useful name and choose Who approves?: a specific person or the submitter’s team leader.
- Complete the approver selection and optional backup person.
- Use Add step for another approval and move steps into the required order.
- Review Active and select Save workflow.
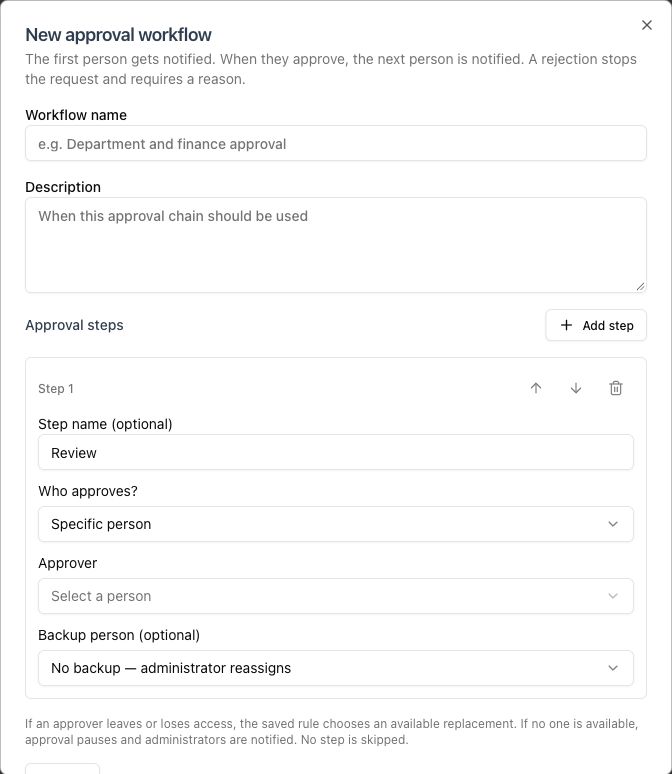
The first approver is notified first. Each approval advances the request to the next step.
If a selected approver becomes unavailable, the saved rule chooses an available replacement. If none is available, approval pauses and administrators are notified; the step is not skipped.
2. Assign the workflow to an action
- Open the Actions tab.
- Find the exact action that needs review and read its description.
- Select the active workflow for that action.
- Save the assignment and verify the chosen workflow remains selected.
- Check the next real request through Approvals.
Actions start with no approval required until configured. Creating a workflow alone does not attach it to every action. Workflow changes apply to new requests; existing requests keep their saved rules and history.
Maintain the process
Edit a workflow to update future approval steps. Review all assigned actions before disabling or deleting a workflow. When deleting an assigned workflow, choose a replacement or deliberately remove the assignments. Removing assignments means those actions no longer require approval for new requests.
Use the Approvals workspace to handle a paused request or reassign an unavailable approver where your administrator controls allow it. Changing configuration is not the same as approving an existing request.