How to create and track email campaigns in Brixit CRM
Create an email campaign from Sales → Contacts → Bulk Actions → Bulk Email, or from records inside a Database. Choose recipients, compose the email, preview it and then send or schedule it. Use Reporting to inspect delivery and recipient outcomes.
Before you begin
Your workspace needs its bulk-email connection configured in Integrations, with batch email enabled, and your role needs permission to send using the selected sender. This campaign workflow uses the workspace’s SendGrid connection. Connecting a personal mailbox for Inbox does not configure bulk email.
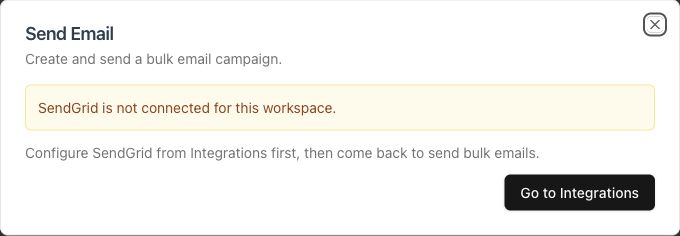
This workspace has no bulk-email connection. Complete workspace email setup to access the composer; the following steps describe the connected workflow.
1. Select recipients
- Open Sales → Contacts and apply the intended filters.
- Select at least two rows to reveal the Bulk Actions menu.
- Choose Bulk Actions → Bulk Email to open Send Email.
- For a database audience, open that database’s records, select rows and use its Bulk Actions → Bulk Email action instead.
Only choose recipients appropriate for your campaign and their communication preferences. Missing email addresses and duplicate addresses can reduce the eligible count. Review recipient exclusions in reporting after the campaign is created.
For one person, use the contact’s email composer instead of the bulk menu. A scheduled email follow-up is a task, not an email campaign.
2. Compose the email
- Select the authorised From user and enter a recognisable Campaign Name.
- Enter Subject and Email Body; both are required.
- Optionally choose a saved template to fill the subject and body. Review the inserted content.
- Use Merge fields to insert supported contact/database and agent values into the subject or message. Choose the fields offered for this audience rather than typing guessed tokens.
- Select Preview Email.
Manage reusable email templates under Settings → Contacts & Inquiries → Email Templates. These are separate from WhatsApp templates and their Meta approval process.
3. Check audience and schedule
In preview, review the From identity, subject, body and recipient count. Use Go back and edit to correct the message. The preview can show merge-field tokens; check that the chosen fields have suitable data for your recipients.
When the filtered list is larger than the selected set, the preview offers Send to all filtered leads (or records for Database). Leave this off to use only your selected rows. Turning it on expands the audience to the matching filtered records; recheck the count before continuing.
To send later, enable Schedule email and enter the date and time. Scheduling uses your browser’s local timezone, which is submitted with the selected time. Check the schedule again if working across timezones.
4. Send or schedule
Select Send Email to … People or Schedule Email to … People only after reviewing the message and audience. This submits the campaign; Preview Email alone does not send. If your company requires approval, follow the approval request. An approved request still needs a successful execution result.
Brixit sends gradually in the background. You can close the composer after the campaign is accepted. Queued, sending or finished status does not establish that every recipient received the email. Check delivery results before resending.
5. Review delivery and recipients
Open Reporting → Open detailed email campaign reporting. The detailed page is titled Batch Emails. Use Everyone or My campaigns, Refresh and the available report filters.
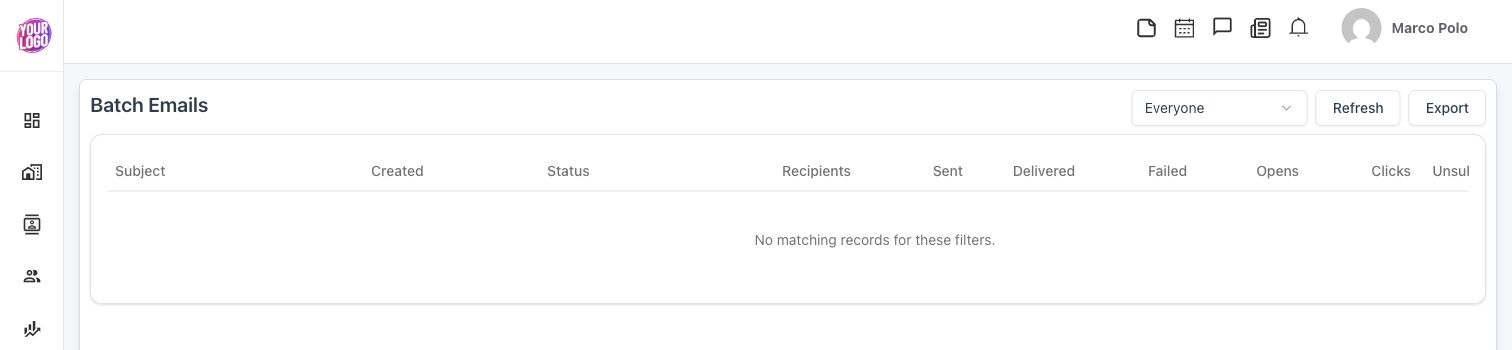
An empty list means no campaign rows are available in the current view. Scroll the table horizontally for the remaining engagement and delivery columns.
| Measure | How to read it |
|---|---|
| Recipients | The campaign’s recorded audience |
| Sent | Messages submitted for sending; compare with Delivered |
| Delivered | Recorded provider delivery events |
| Failed / Bounces | Sending failures or rejected deliveries to investigate |
| Opens / Clicks | Recorded engagement events; these do not prove a person read the message or wants contact |
| Unsubscribes | Recorded unsubscribe events to respect in future outreach |
Open a campaign’s recipient details to inspect state, Exclusion Reason, Failure Reason and Last Event. Use the available Export controls for campaign or recipient CSVs. Use Marketing & Outreach for aggregate email engagement and database calling results.
Cancel or retry carefully
Cancel stops pending recipients after confirmation; it cannot recall email already sent. If sending is paused, read the notice: an administrator may need to review delivery problems, the recipient list or the email connection.
Where Try Again or Retry Bounced is available, open Retry Campaign. Choose Retry failed and bounced recipients or Retry the full campaign, review the scope, then select Queue Retry. A retry creates a new campaign. Retrying the full campaign can email successful recipients again, so resolve the original cause and check that this is the intended audience before submitting.
Common questions
Why is Bulk Actions missing?
The current bulk-action menu appears when at least two rows are selected. Also check your permission to send bulk email.
Why does the recipient count change?
The selected rows, filtered audience and eligible unique email recipients can differ. Check the all-filtered toggle, missing addresses, deduplication and recorded exclusions.
Does my personal mailbox connection enable campaigns?
No. Personal Inbox and the workspace’s bulk-email connection are configured separately.