
Add custom fields to records in Brixit CRM
Use Settings → Custom Fields for information your team needs beyond the standard record fields. Decide which module owns the information and how agents will use it before creating the field.
Create a field
- Select Create.
- Choose the Module where the field belongs.
- Enter a clear Field Label.
- Choose the Type that fits the data.
- For a choice-based type, enter the allowed Values with Add Value. Remove blank or duplicate options before saving.
- Set Required only if every relevant record should supply a value.
- Review Show on Table and Allow in Excel Export independently.
- Select Save and check the field in that module’s create/edit form.
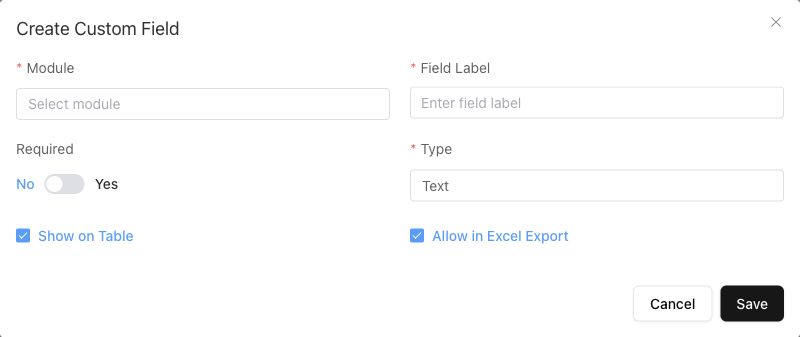
A field can be required, visible in a table and included in exports independently.
Verify the field where it is used
Open the relevant record form and confirm the label and input type. If required, verify that agents know what value to enter. Check the module’s table and export choices where you enabled those options. Table visibility does not replace the module’s access controls.
Maintain existing fields
Use Filters in Custom Fields to find the right module and field, then use its row actions to edit available properties. Review existing data before changing or removing a field; the edit form may restrict changes to the original module or type.
If a field is missing, check its module, saved configuration and where that module exposes custom fields. If a record stops saving after a configuration change, inspect newly required custom fields and their allowed choices.