
Configure listing options and watermarks in Brixit CRM
Open Settings → Listings. These settings supply options used in property forms.
| Tab | What to maintain |
|---|---|
| Amenities | Features agents can select, such as parking or a balcony |
| Developers | Developer names used to identify and filter properties |
| Sources | How the brokerage obtained the listing |
| Watermark Settings | Company watermark image, placement, opacity and default behavior |
Add or correct a reference value
- Choose Amenities, Developers or Sources.
- Search first to avoid creating a duplicate label.
- Select Add, complete the fields shown, and save.
- Use a row’s Edit action to correct an existing value. Amenities also include an icon.
- Open a listing form and confirm the intended value is available.
Review use of a value before deleting it. A rejected deletion may indicate that records still depend on it. Listing sources belong to property records; contact/inquiry sources are maintained in Sales settings.
Configure a watermark
- Open Watermark Settings.
- Upload the company watermark image. The screen accepts PNG, JPG, GIF or WebP up to 5 MB and recommends 150–300 pixels; images may be resized.
- Choose Watermark Position and Watermark Opacity.
- Review the preview so the branding remains legible without obscuring the property.
- Decide whether to enable Apply Watermark by Default for new listing images.
- Select Save, then review the watermark option when adding listing photos.
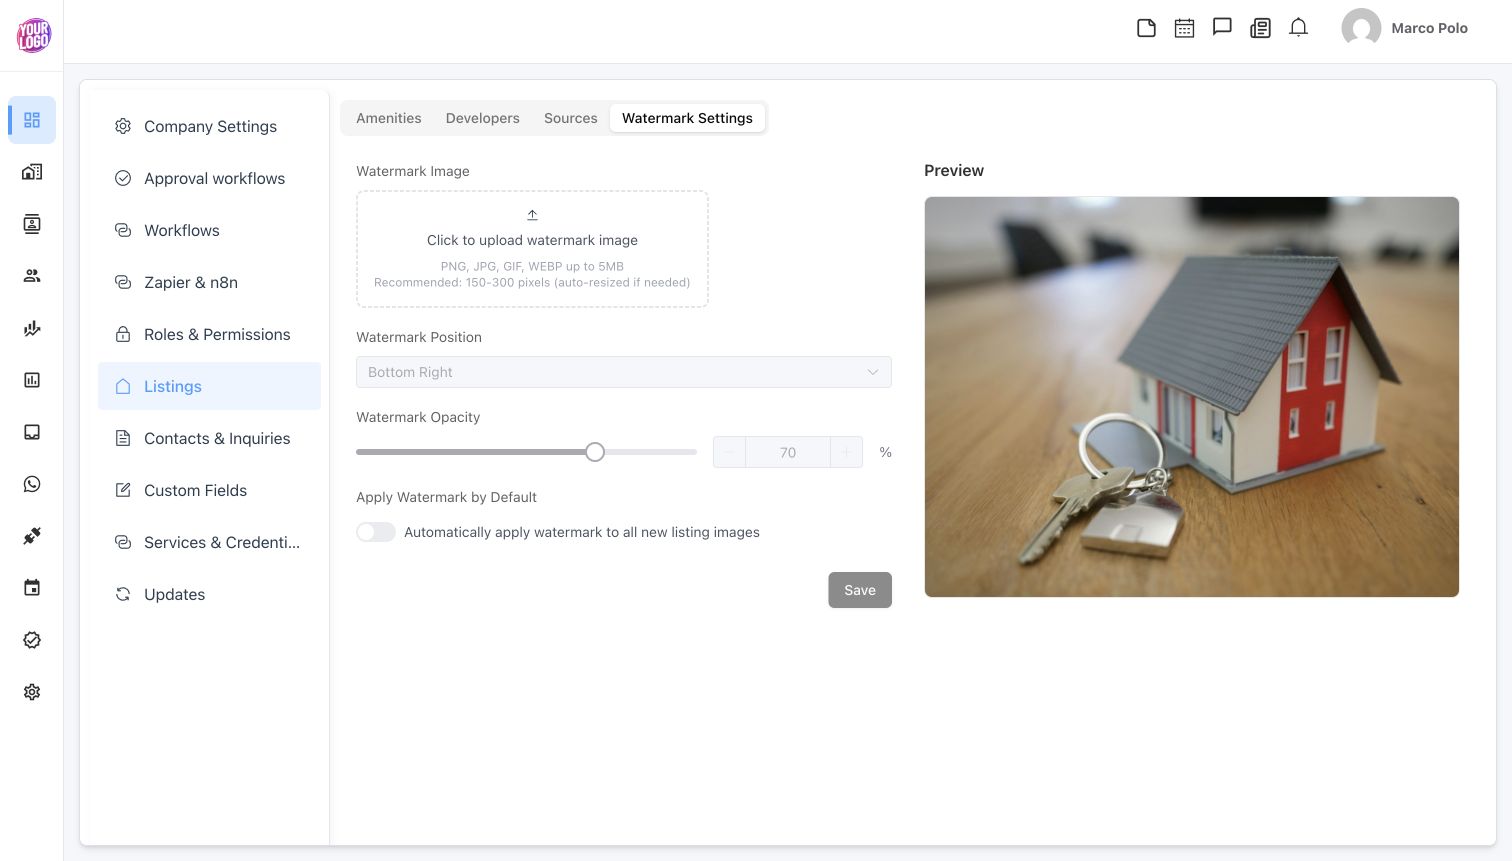
The controls remain disabled until a watermark image has been configured.
Do not assume that changing the default retroactively changes every existing photograph. Review the images on the listing you intend to share or publish. Portal connection and publication are separate tasks: see Publish a listing.