
Configure Brixit CRM
Open Settings in the left navigation. Company settings are shared configuration; your personal profile and email connection are under the avatar’s Profile Settings. Available settings depend on your role.
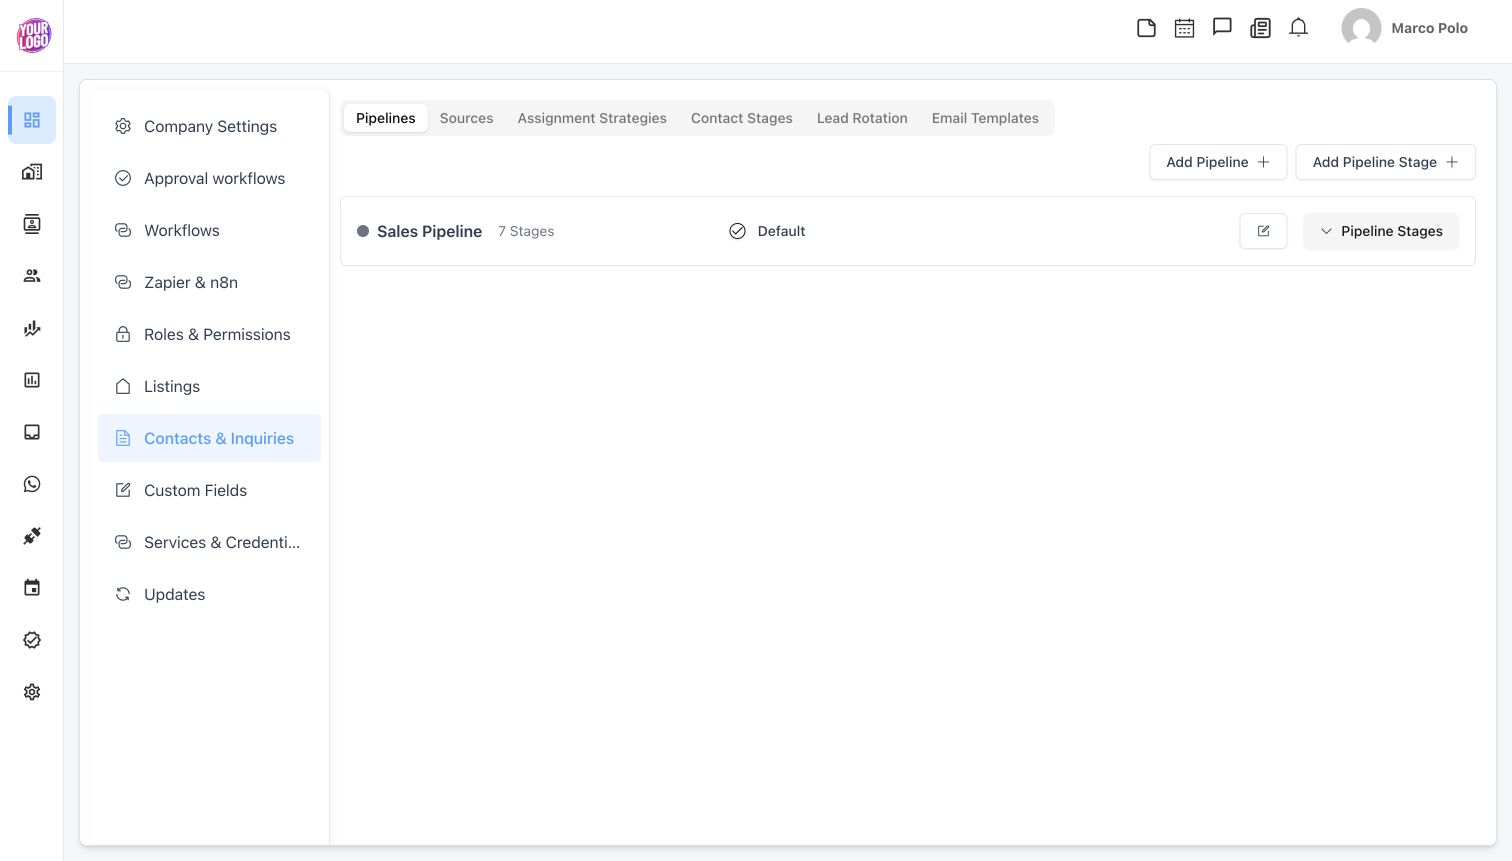
The Settings sidebar and the six Contacts & Inquiries tabs in the desktop CRM.
| Settings menu | What it controls | Guide |
|---|---|---|
| Company Settings | Company identity, contact details, currency and logo | Company and access |
| Approval workflows | Approval chains and which actions need review | Configure approval workflows |
| Workflows | Automated sequences for contacts or inquiries | Build a workflow |
| Zapier & n8n | Automation connections | Services and connections |
| Roles & Permissions | Role permissions and record visibility | Company and access |
| Listings | Amenities, developers, sources and watermark settings | Listing settings |
| Contacts & Inquiries | Pipelines, sources, assignment, stages, rotation and email templates | Sales settings |
| Custom Fields | Extra record fields, required values, table and export visibility | Custom fields |
| Services & Credentials | Service availability and company/provider-managed connections | Services and connections |
| Updates | Installed version, available releases, update scheduling and maintenance status | Updates |
A practical setup order
- Check company identity and currency.
- Create the departments, designations and employees, then review roles.
- Configure contact stages, inquiry pipelines, sources and listing reference data.
- Create assignment strategies before connecting lead forms or intake channels.
- Connect the required apps and portals.
- Configure approval rules and automated workflows, review their behavior, then enable the intended processes.
After a setting is saved, reopen the affected form or list and verify the choices agents will use. A setting that changes ownership, access or automated communication can affect other people; review the intended effect before saving it.