
Build an automated workflow in Brixit CRM
Open Settings → Workflows to build sequences for contacts or inquiries. Workflows can create follow-up tasks, send messages, add notes, change stages or assign an agent using the actions available to your workspace.
1. Start with a template or new workflow
Select Browse templates to find a sequence by goal, scope and channel. Open a template to review its steps before using it. Templates open disabled for review. Alternatively, select Create workflow to start a new draft.
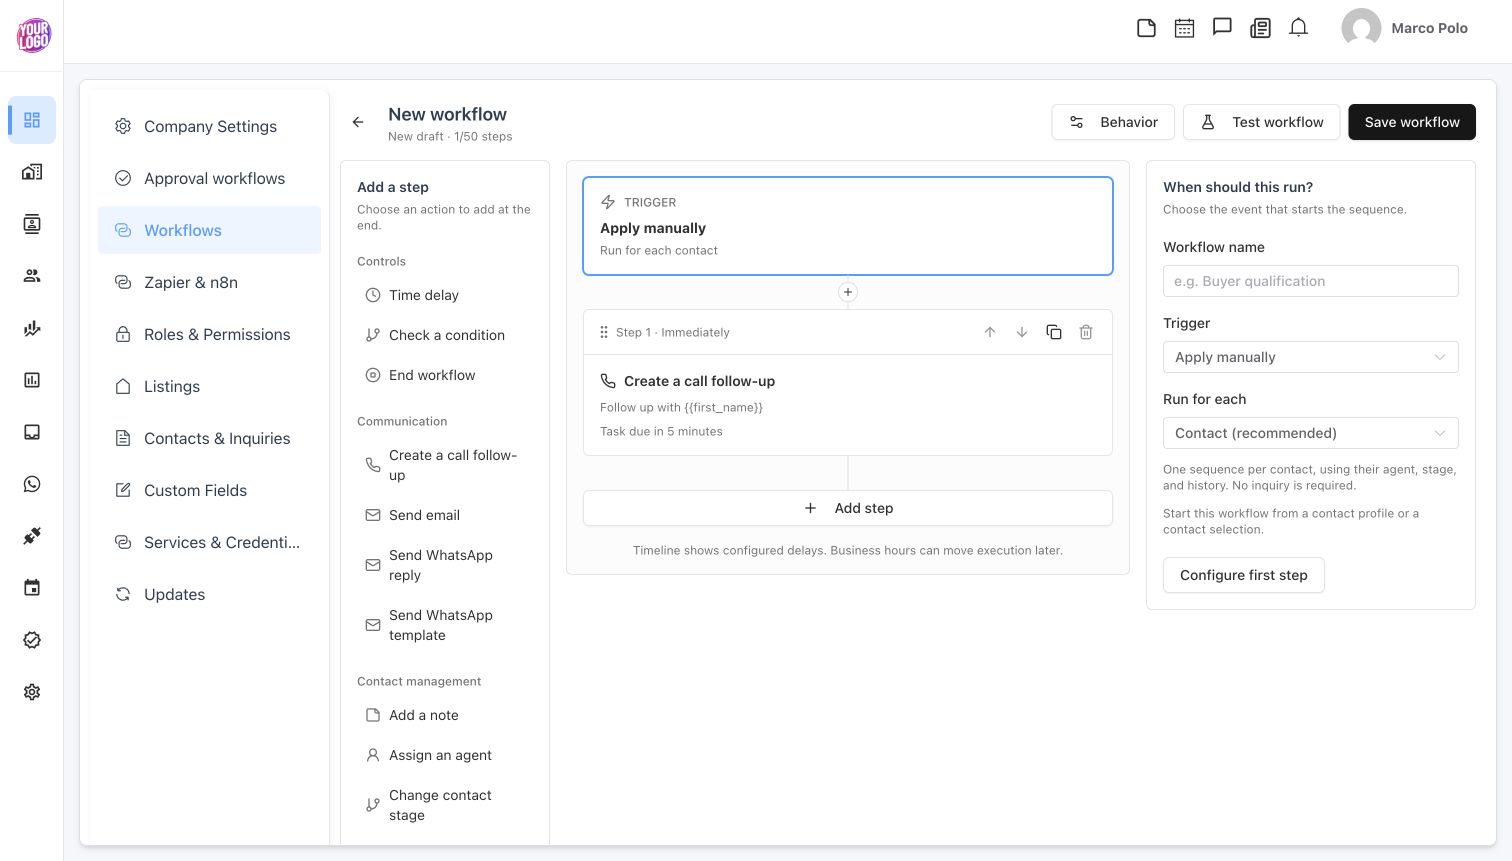
A new unsaved contact workflow. The timeline shows the sequence and the right panel edits the selected item.
2. Choose the trigger and scope
- Enter Workflow name.
- Select the Trigger that should start the sequence.
- Choose Run for each: Contact or Inquiry.
- Complete any trigger-specific values, such as inactivity duration or stage selection.
A contact workflow uses the person’s agent, stage and history without requiring an inquiry. Choose inquiry scope when the sequence is about a particular requirement. Apply manually starts through an explicit workflow action; it is useful when the agent decides which records should enter.
3. Configure the steps
Choose an action from Add a step, then select the step in the timeline to edit it. Use move, duplicate and remove controls to arrange the final sequence.
| Action group | Check before saving |
|---|---|
| Time delay | How long to wait before continuing |
| Check a condition | The condition that must match; a non-match ends that path |
| Create a call follow-up | The task text, assignee behavior and due interval |
| Send email | Connected mailbox, recipient data, subject and message content |
| Send WhatsApp reply/template | Available connection, template and delivery eligibility |
| Add a note / Assign an agent / Change stage | Exact content or destination for the selected scope |
| End workflow | Where the sequence should stop |
Use the available personalization controls and review messages with a representative record. Sending messages is different from creating a follow-up task for an agent to do.
4. Review Behavior
Open Behavior and review repeat enrollment, the minimum interval between enrollments, whether to pause when the contact replies, and business-hours behavior. When enabled, the business-hours option runs Monday–Friday, 9 AM–6 PM in the company timezone; this can move execution later than the raw delay shown in the timeline.
5. Preview before enabling
- Select Test workflow.
- Choose a test contact and, for inquiry scope, the relevant inquiry.
- Select Preview without running.
- Review each step’s eligibility, condition outcome and timing; correct the configuration.
- Save the reviewed workflow and enable it only when the trigger and actions are ready.
Preview without running and Save and start workflow have different effects. The latter saves and starts real work for the selected record. A successful preview is not a guarantee of message delivery; connection and delivery checks still apply at runtime.
Monitor running work
Return to the workflow list and use Run history to inspect executions and step results. Use the Enabled, Disabled or Needs attention filters to narrow the list. Investigate connection errors, missing recipient data or unmatched conditions before trying again. Check existing runs before starting another sequence for the same person.
For external automation connections, see Zapier and n8n setup. For human review gates, use Approval workflows.