
How to add and manage a property listing in Brixit CRM
To add a property listing in Brixit CRM, open Property → Listings → Add. Complete the property details, add a description and photos, then select Create. Saving a listing does not publish it to a portal; use the separate portal publishing workflow when it is ready.
A listing holds the property’s description, price, location, media, owner and assigned agent.
Before you start: you need permission to add listings, the property’s details and photos you are authorised to use. If you want to link an owner, create their contact record first.
1. Add the property details
- Open Property → Listings and select Add.
- Choose Listing Type for sale or rent, then Property Type.
- Select the Owner, if available, and check Assigned To.
- Enter a clear Title, Price and the appropriate Status.
- Complete the additional property fields that appear for the selected type.
- Set Exclusive only when applicable and choose the listing Source.
- Enter and select the Location. Check the resulting location before saving.
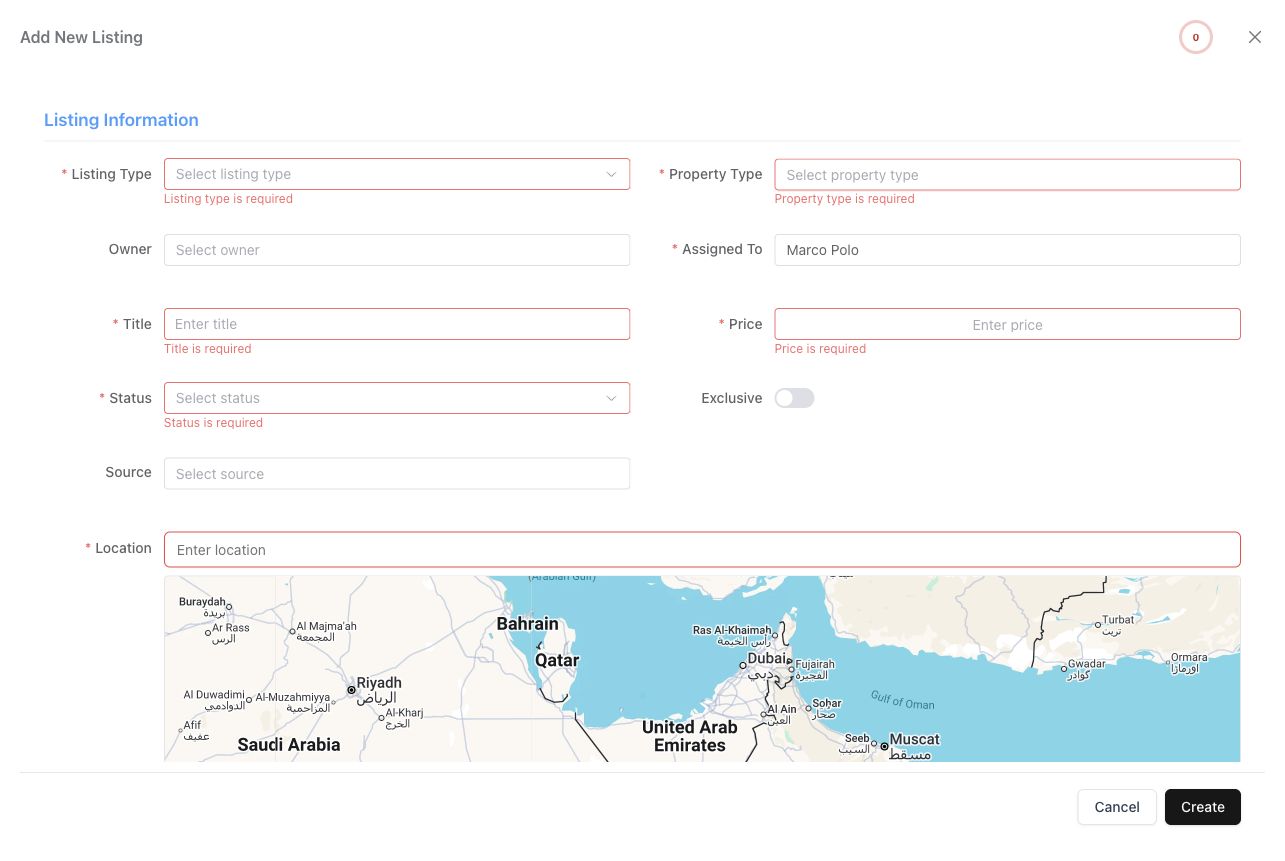
The first part of the listing form. The quality indicator is in the top-right corner.
2. Add the description and photos
- Scroll inside the form to Description and describe the property’s features accurately.
- In Images, select Select images or drop your photos into the upload area.
- Use JPG, PNG or WebP files, up to 10 MB each, and complete the required 4:3 crop.
- Review the images before saving. If you need a watermark, ask an administrator to configure the company’s watermark settings before using Apply Watermark.
- Add a Video Link or VR Link if you have one.
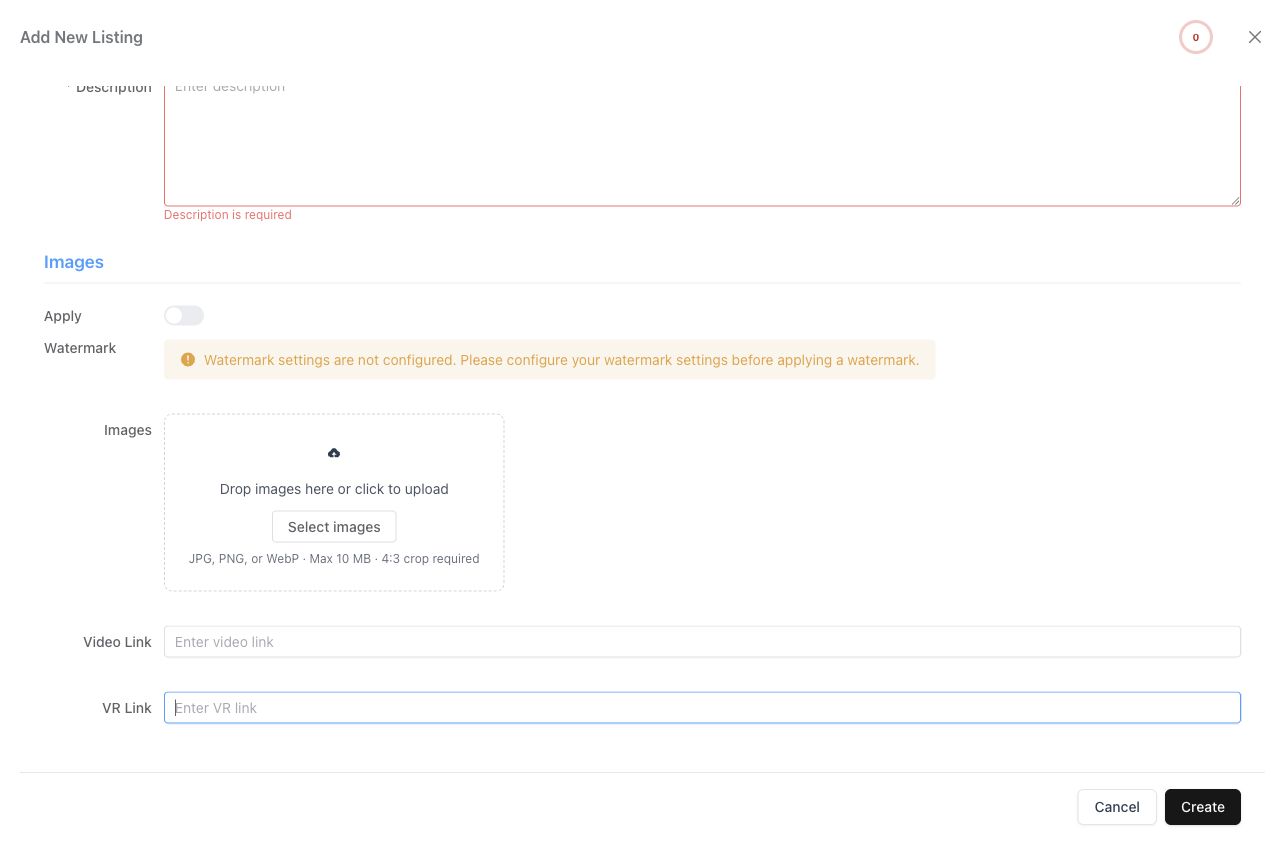
Media controls lower in the same form. The watermark option is unavailable in this example because it has not been configured.
3. Save and review the listing
- Select Create. Complete any missing required or custom fields identified by the form.
- After saving succeeds, open the listing from the list.
- Check the overview, price, location, photos and assigned agent.
- Review the Quality indicator and its missing-information checklist. Use it to identify details to improve before sharing or publishing.
To change an existing property, open its row’s Actions menu and choose Edit Listing. Use Change Agent when responsibility moves to a different colleague and your role allows reassignment.
4. Choose how to market it
For a client-facing link, follow Share listings with clients. You can share a single property or build a collection.
For a property portal, follow Publish a listing to a portal for the full publication, update, sync and unpublish procedure. Saving a CRM listing or marking it active does not, by itself, confirm that a portal has published it.
Add documents and follow-up work
Open Documents → Upload to attach supporting files; follow the document guide for limits, preview and download. Open Followup → Add Followup to schedule property work or Create Note to record context. See Follow-ups and notes for reminders, outcomes and rescheduling.
Find and maintain existing listings
Use Filters and the table, card or map view controls to find relevant properties. The table includes price, size, matches, quality, status and portal information. Review matching inquiries with the responsible agent and keep availability and price current.
If something does not work
| What you see | What to check |
|---|---|
| Create does not finish | Scroll through the form for required fields, custom fields and validation messages. |
| Image cannot be uploaded | Check its file type and size, then complete the crop step. |
| Watermark is disabled | Configure the company’s watermark settings first. |
| Property is absent from a portal | Check the listing’s Portals tab and that portal’s connection, required fields and returned errors. |
| Listing is missing from your list | Clear filters and check status, assignment and your record visibility. |
Related: Listing shares · Inquiries · All CRM guides.